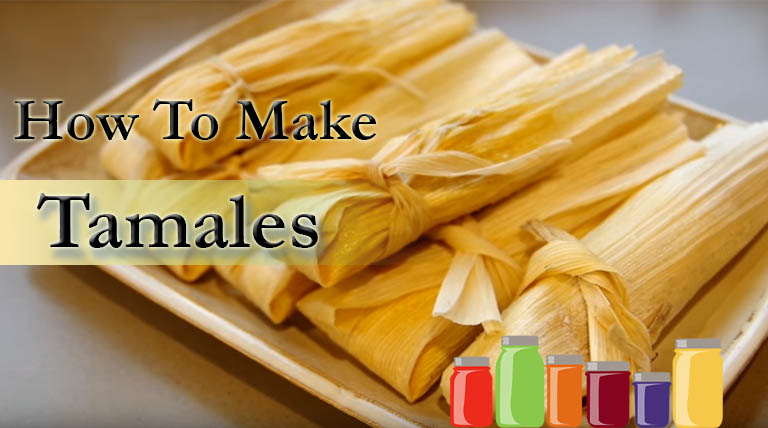
How To Make Tamales With A Pressure Steamer
Yield: Approx. 35 tamales each recipe
Total Time:
2 hours 20 minutes
Prep: 1 hour
Inactive: 1 hour
Cook: 20 minutes
What could be better than a batch of fresh homemade tamales? How about impressing your family and friends with a couple dozen of these tasty treats?
We'll show you how to make two different kinds of tamale fillings and dough, assemble your tamales like a pro and then cook them in a pressure canner/steamer in way less time than it would take in a traditional steamer!
We paired the Spicy Pork Filling with the Basic Masa Dough and the Vegetarian Cheese Filling with the Vegetarian Masa Dough, but feel free to mix and match however you'd like.
Materials Needed:
- Knife and cutting surface
- Electric stand mixer or hand beater
- Pressure canner/steamer set-up
- Stovetop canner
- Steamer rack
- Masa dough (see recipes below)
- Tamale fillings (see recipes below)
- Corn husks
Ingredients:
Pork Tamale Filling
- 1-1/2 cups (8 oz) diced carrots
- 1 ea (8 oz) sliced onions
- 1-1/2 cups (8 oz) sliced peppers
- 1/4 cup apple cider vinegar
- 1/8 cup sugar
- 2 lbs pork
- 2 tsp salt
- 1/4 cup olive oil
- 1 cup water
- 1/2 cilantro leaves
-
1) Place all of the above in a slow cooker/crockpot and cook 6-8 hours on medium or high. 2) Pull pork with all ingredients and place in refrigerator. 3) Allow to cool at least 2 hours. 4) Drain excess liquid from mixture (and save it for cooking other meals). 5) Make sure all ingredients are well-mixed before using to fill tamales.
Veggie Tamale Filling
- 2 cups (6 oz) sliced cabbage
- 1-1/2 cups (8 oz) diced carrots
- 2 Tbs olive oil
- 1 ea (8 oz) sliced onions
- 1-1/2 cups (6 oz) sliced peppers
- 1/4 cup apple cider vinegar
- 1/8 cup sugar
- 2 tsp salt
- 1 cup (5 oz) cheddar (or other) cheese, diced
-
1) In a pot, sauté carrots and onions in olive oil. 2) When softened, add cabbage and peppers. 3) Sauté for 2-3 minutes more. 4) Add vinegar, sugar and salt. 5) On high heat, stir all ingredients to coat. 6) Remove pot from heat and let cool 15 minutes. 7) Add small-diced cheese and stir to mix. 8) Allow to fully cool and make sure ingredients are well-mixed before using to fill tamales.
Basic Masa Dough
- 1-1/2 cups (12 oz) pork fat/lard
- 2 tsp baking powder
- 4-1/2 cups (1-1/2 lbs) masa harina corn flour
- 3 cups hot water
- 1-1/2 cups beef or chicken broth
- 1 tsp salt
- 1/2 tsp cumin
Vegetarian Masa Dough
- Using recipe above, substitute the following ingredients, as indicated:
- 1-1/2 cups (12 oz) butter in place of pork fat/lard
- 1-1/2 cups vegetable broth in place of beef or chicken broth
-
1) To prepare masa dough, pour hot water over masa harina flour and mix thoroughly. 2) Let sit 15 minutes to fully hydrate. 3) In an electric mixer, or with a hand beater, whip up the fat/lard (or butter), baking power, salt and cumin until fluffy, about 1 minute. 4) Once whipped, begin alternately adding the masa mix and the broth, continuing to mix on a slow-medium speed. 5) When all ingredients are well mixed, try dropping a teaspoon of the dough into a cup of cold water. 6) If it floats, you've got a nice, fluffy dough. 7) Chill dough for at least 1 hour before making tamales.
Assembly & Steaming Directions:
- Place the corn husks in a bowl or tub and cover them with hot water. Weight them down with something heavy to keep them submerged. Let them sit for an hour or so until they're very pliable.
- Prepare fillings and masa dough according to the instructions above.
- Take the corn husks out of the hot water and pat them dry with a towel.
- For tamale assembly, gather up the following:
- Corn husks
- Masa dough
- Tamale fillings
- Bowl with water to wash your hands so they don't get too sticky
- Assemble your tamales with these easy steps:
- Place the tapered end of the corn husk toward you.
- Take a small amount of dough and roll it into a ball in your hands.
- Spread the dough into a fairly even rectangle, leaving a border around the husk, so the dough doesn't overflow.
- Then take a little bit of filling and place a line of it down the middle of the dough.
- Grab both sides of the husk and pull one side of the masa over to the other so they touch on top of the filling. Pull back the husk quickly so it doesn't stick to the dough. Press all sides of the masa together so you don't see your filling anymore.
- Hint: If your hands or the dough have too much water on them, the masa dough will stick.
- Wrap one side of the corn husk over the masa, fold up the tapered end and fold over the other side.
- Tie everything together with a piece of string or a strip of corn husk.
- Once all of the tamales are prepared, you're ready to pressure steam them.
- Prepare the pressure steamer (we used a GraniteWare 20 qt pressure canner/cooker/steamer).
- Add 3 quarts of water to the pot, so it's just under where the steamer rack sits. You don't want your tamales sitting in any of the water.
- Place the steamer rack in the pressure steamer.
- Place the tamales, folded side down and open side up on the steamer rack. This keeps the filling from leaking out while steaming.
- Next, place the lid on the steamer, lining up the arrows on the lid with the arrows on the handle.
- Turn the lid until the handles on the top are lined up with the handles on the steamer.
- Put the filled steamer on the stove and turn on the burner to a relatively high heat.
- Leave the heat on high until a steady stream of steam flows freely from the vent pipe.
- Exhaust all the air from the steamer for 10 minutes.
- Carefully place the pressure regulator, with 2 weights (15 psi) over the vent pipe.
- Wait for the pressure regulator to start rocking.
- Once the pressure regulator begins to rock, adjust your heat.
- You want the rocking to be steady and consistent-- not stopping and starting.
- Set your timer for 20 minutes. (About 1/3 of the time it would take in a traditional steamer!)
- After 20 minutes, turn the burner off and let the pressure steamer just sit, allowing the pressure to release naturally.
- Once the pressure is released (approx. 5-10 minutes), carefully remove the pressure regulator. (Use a hot pad or tongs to avoid burning yourself.)
- Loosen the lid on the steamer and then carefully remove it, being sure to tip it away from you to shield yourself from any residual steam in the pot.
- Now it's time to enjoy your HOT TAMALES!
NOTE: Tamales can be placed in plastic bags and stored in the freezer for enjoying later. When you're ready to eat them, simply place them in a traditional steamer and steam for approximately 10-15 minutes. No need to thaw them out!
Frequently Asked Questions and Quick Tips!
Never be afraid to ask!
- Can I use my canner as a pressure COOKER?
ANSWER: While many pressure canners may be used to pressure cook, it’s always good to check your instruction manual to ensure the manufacturer recommends it for this use. If your pressure canner can also be used to pressure cook, then utilizing it in this way may just be matter of personal preference—since pressure canners tend to be much larger than pressure cookers.
- What are the advantages of pressure cooking/steaming?
ANSWER: Pressure cooking/steaming takes less time than conventional cooking techniques. Typically, pressure cookers/steamers can reduce cooking times by as much as 70%. In addition, pressure cooking/steaming is very healthy. Because foods cook in a shorter amount of time, they retain more of their nutrients. In addition, it can make a less expensive cut of meat more moist and tender than with traditional cooking methods.