
How To Use A Pressure Cooker

Print/Download:

How Use A Pressure Canner As A Pressure Cooker
But not ALL of them. There is a distinct difference between a pressure canner and a pressure cooker. As a rule of thumb, whatever word is on the box...use it for that!
Remember, NEVER use a pressure COOKER as a CANNER. They're usually too small to be practical, they aren't designed to be as accurate, your jars may break from being too close to the burner, and tested canning recipes require specific conditions, accounting for larger standard canners.
Meanwhile, only some pressure CANNERS can be used as COOKERS. Most canners are made of metals which react with foods at high temperatures, so you need to check with the manufacturer before attempting to cook food in direct contact with your canner.
In addition, if you DO choose to cook food in your canner, make sure you don't cook things that will bubble or foam much. Only fill the pot about half way; you don't want to clog and gunk up the various valves and vent pipes.
Our friends at Granite•Ware sent along a pair of their new pressure canners, which are pretty unique. They have a hard, anodized surface that makes them nonreactive. THESE canners can be cooked in! We tried both their 12.5 quart pot and their 20 quart pot. For large batches of food, or for big roasts, these are great!
We are including a recipe for Pinto Beans for you to try out. The fine details of recipes in a canner aren't as important as the concepts; foods will cook faster and hotter, and less liquid will evaporate from the food.
How Does Pressure Cooking Work?
- The boiling point of water is 212 degrees Fahrenheit (100 degrees Celsius) at sea level.
- If you cook beans on a stovetop, or braise a cut of meat, your food will rise in temperature until it reaches 212°F/100°C; then it'll just stay there, cooking, until the water all boils away.
- When you seal that same food in an environment that does not allow moisture to escape, steam builds up. That steam gets hotter and hotter, pressing against the walls of the pot, but since there is no relief it just increases the pressure inside.
- As pressure increases, so does temperature. If you take that pressure cooker up to 15 PSI (pounds per square inch), you've increased the temperature inside to around 250ºF/120°C! That's almost 40 degrees F hotter than the food would be in an open pot!
- If you are using a weighted-gauge pressure cooker (the ones with the gadget on the top that rocks back and forth), it is calibrated to allow little puffs of steam out when the pressure/temperature get to a certain point. That's what the rocking IS...it's little puffs of steam that have forced their way up through the vent pipe, pushing the weighted regulator aside for an instant.
- In that way, a weighted-gauge pressure cooker regulates (ah, THAT's why they call the weight on top a regulator!) what's happening inside. That's why it won't explode, unless you REALLY crank up the heat and leave the house for the day (even then, modern pressure canners and cookers have lots of safety features that shouldn't allow that to happen. Please don't try it.).
- This benefits you in several ways:
- Higher heats, as you can imagine, cook foods faster. Beans may take only 25 minutes instead of 60, for example.
- Certain materials, like connective tissue in meats, don't break down very well at lower temperatures. At higher temperatures (under pressure), they begin to dissolve or denature, making tough cuts of meat less chewy and more tender.
- Flavors can permeate meats and vegetables deeply in a very short time.
- And, most practically, if you forgot you invited friends over for dinner, you can throw together some amazing food quickly; often in less than an hour, from pulling things out of the fridge to serving a meal up!
Things To Remember When Cooking With Pressure
- You're intentionally forcing steam to stay in the pot with a sealed lid, so moisture is not escaping as much as it would in a normal pot with a loose lid.
- Therefore, if you are adapting a recipe, especially with grains, reduce water and liquids by about 15-20%.
- This varies widely, depending on your pot and your foods, so you'll need to experiment, or follow a tested recipe.
- Things are HOT in there! Be careful!
- Your canner or cooker, especially if it is newer, has lots of safety features; there are valves or rubber stoppers that will pop out if something goes wrong.
- However, you should ALWAYS stay near your stove and monitor the heat and the timer.
- When opening the lid of the cooker, tilt it so that it shields you from the steam.
- Do NOT attempt to remove the lid of your cooker until the pressure has dropped completely.
- There is usually a locking pin that will drop down or a dial that will read "0" when the pressure is fully released.
- Some instructions tell you to put the cooker in the sink and run cold water over it. This can warp the metal if you do this too rapidly or too often; usually it's best to just let things come down in place, on the stove. It rarely takes more than 5-8 minutes for the pressure to return to normal after shutting off the heat.
RECIPE: Pinto Beans In A Hurry
Ingredients:
Imperial Units
- 3 Cups Pinto Beans
- 12 cups Water
- 2 Tbs olive Oil
- 1 each Yellow Onion (rough chopped)
- 2 each Bell Pepper (rough chopped)
- 6 each Garlic Cloves (rough chopped)
- 1 cup Sherry or Wine
- 2 Tbs Ground Cumin
- 1 bunch Cilantro (rough chopped)
- 2 each Bay Leaves
- 2 tsp Salt
Metric Units
- 700 ml Pinto Beans
- 2.8 L Water
- 2 Tbs olive Oil
- 1 each Yellow Onion (rough chopped)
- 2 each Bell Pepper (rough chopped)
- 6 each Garlic Cloves (rough chopped)
- 1 cup Sherry or Wine
- 2 Tbs Ground Cumin
- 1 bunch Cilantro (rough chopped)
- 2 each Bay Leaves
- 2 tsp Salt
Directions:
- Remember to clean your cooker and check the vent pipe to make sure it's clear!
- With the lid OFF, put the cooker pot on the stove and turn to high.
- Add the olive oil and saute your onions, peppers, and garlic until onions begin to brown.
- Deglaze the pot with the sherry.
- Add beans, water, cumin, cilantro, bay leaves, and salt. Stir to combine.
- Put the lid on the cooker, locking it on, as per the manufacturer's directions.
- In about 5 minutes, steam should start streaming out of the vent pipe.
- Set a timer for 10 minutes, letting that steam escape in a steady stream.
- Close the vent by adding the regulator with 2 weights on it.
- This will allow the cooker to get up to 15 pounds per square inch (PSI)
- Wait for the regulator to start rocking.
- When it is rocking steadily and constantly, set a timer for 25 minutes.
- Keep an eye on things and turn the heat down just low enough that the regulator keeps rocking.
- When your time is up, turn off the heat and let the cooker cool down on its own.
- This just takes a few minutes, and varies depending on your cooker.
- Once the locking pin has dropped down or (if your cooker has a dial gauge) your gauge reads zero, remove the regulator, then the lid.
- Serve it up!
- Your beans should be nice and tender, but not breaking down.
- If your beans aren't totally cooked, you can repeat the process for a few minutes or boil them as normal, with no lid. Every cooker is different, so make a note that you should add a few minutes on to other recipes in the future.
- Nice job!
Recipe Source: href="https://www.youtube.com/watch?v=-pdV42RMkDA"Unless indicated otherwise, images, recipes, and other content are Copyright The Mason Jar Suite and Trav Williams. You may print and utilize this information for home and personal purposes. If you wish to republish this recipe, please link to this post or get in touch for other purposes.
- Deglaze the pot with the sherry.
How To Can Fish (Salmon, Tuna, and more!)
Print/Download:
How To Can Fish
Yield: As Much As You Have!
Total Time:
Active: 45 Minutes. Canning: 100 Minutes. Cooldown: 12 Hours
And then the power goes out. Shoot. It’ll probably be back on shortly, but maybe it’s best if you don’t open the freezer door for awhile. What now?
It’s high summer and it’s hot. The sun rises early, and so do you; it sets late, and you spend every bright hour in the garden or on a tractor. It’s lunchtime and you don’t have time to cook! It’s too beautiful outside to waste time indoors. But you’re so hungry!
And then you see the salmon on the shelf that you caned last year. Or maybe it was albacore tuna, or halibut, or trout. There’s a line of mason jars filled with pink, tucked back on a dark shelf. Oh, thank goodness!
Pull out a can of fish, pop the lid, and let it drop into a bowl, its skin still sparkling with greens and blues! Add a scoop of relish, a dollop of mayo, maybe some mustard, salt, or diced veggies. Crush it all up with a fork and spread it on the closest bread-like thing you can find!
Now you can get back out to the garden. Or, if it’s cold, you can get straight under the covers with a book. Dinner’s taken care of. You cooked it last year so you wouldn’t have to worry about it tonight. You put fish in jars, and now you know you can’t ever let a season go by without doing it again!
Fish is, in fact, one of the easiest things you CAN can, as long as you use a pressure cooker. All you need is:
Materials Needed:
- Knife and cutting surface
- Pint jars or half-pint jars (wide-mouth are easiest to work with)
- Lids for your jars (new)
- Rings for your jars
- Pressure Canner
- Weighted-gauge or Dial-gauge
- Canning Rack
- Jar lifter
Ingredients:
Imperial Units
- Fish (Just about any kind)
- Salt: 1 tsp per half-pint, 2 tsp per pint (optional)
Metric Units
- Fish (Just about any kind)
- Salt: 5 ml per half-pint, 10 ml per pint (optional)
Directions:
Always use a tested recipe from a trusted source! When pressure canning low-acid foods, you MUST follow processing times EXACTLY for safety's sake.
- Set up your pressure canner!
If you've never worked with one, or need a refresher, check out our videos on canning basics here:
Weighted Gauge Pressure Canners: https://themasonjarsuite.squarespace.com/videos/weighted-gauge-pressure-canner/2016/3/28
Dial Gauge Pressure Canners:b> https://themasonjarsuite.squarespace.com/videos/2015/3/15/how-to-set-up-and-use-a-dial-gauge-pressure-canner - Get your jars, rings, and lids ready.
Make sure you're using NEW lids to ensure a safe seal. Check for knicks, scratches, or cracks.
Because we are pressure canning and packing the fish cold (we aren't heating it up first), you DON'T need to heat up your jars or lids. - Prepare your fish.
- Measure and cut the fish.
Cut the fish into desired sizes. You can cut it into chunks, steaks (through the spine), or slice pieces from a fillet.- If you're going for large pieces in each jar, measure the inside of the jar first (not all pints have the same depth!)
- You'll need an inch of headspace (25 millimeters) in the jar, so cut the fish into pieces that are 1 inch (25 mm) shorter than the jar's interior.
- For the average pint jar, you'll cut the fish to about 3.5 inches (89 mm) and for the average wide-mouth half-pint, cut the fish to about 1.5 inches (38 mm).
- Fill your jars with fish.
Pack it in tightly!
If the skin is against the glass, it can be beautiful on the shelf, but the scales tend to glue themselves to the sides of the jar.
- Add salt (optional).
- 1 tsp (5 ml) per half-pint
- 2 tsp (10 ml per pint
- Clean the jar rims
- Add lids and rings.
- Put water in the canner.
- Put jars in canner.
- Seal the canner.
- Begin heating.
- Exhaust steam for 10 minutes.
- Put regulator on canner with one weight on it (for weighted gauge canners), or put the safety weight on (for dial gauge canners).
- Wait for consistent rocking (for weighted gauge canners) or bring the dial up to 10 pounds pressure (PSI).
- Start a timer for 100 minutes (1 hour, 40 minutes).
- Turn off heat and wait.
- Remove the regulator.
- Open the canner.
- Remove jars and let cool.
- Remove rings. Label and date!
If the fish is whole, get rid of the viscera, the head, the fins, and the tale.
You do NOT need to get rid of bones or skin. They will dissolve and be edible! Scaling is optional. Scales will also be edible, but can stick to the jar and be VERY difficult to get off later.
Add as much or as little as you like, but a rule of thumb is:
It's important to use NEW lids. You can re-use rings without issue, as long as they are clean.
For most canners (check the directions), you'll want about an inch of water (25 ml) in the canner.
Remember, you are NOT submerging the jars under water! You just want some water in there to create steam, which is what creates the pressure inside.
If you are using half-pints, and if you have a large enough canner, you may stack jars on top of each other. Personally, I try to offset them, so they are sitting on the edges of the bottom jars' rings.
Use a canning rack. If the jars touch the bottom of the canner, they may heat unevenly, causing them to shatter. That's a waste of fish AND jars!
This is important. As the inside of the canner heats up, steam forces air out, through the vent pipe. Exhausting the canner ensures that there are no pockets of air left inside, which could affect the temperature and pressure during cooking.
You may see some sputtering and inconsistent puffs of steam. That's normal, but wait until the steam is constant before starting your timer for 10 minutes.
Just slip it on there carefully. Make sure that it is loose. If using a dial gauge canner, this will usually be located next to the dial.
Not sure what that rocking looks like? Watch the video!
According to the USDA and tested recipes, fish needs to be canned under pressure for 100 minutes.
The timer should ONLY be started when rocking is consistent, or when your dial reads 10 PSI. If your dial drops BELOW 10 PSI, or if your regulator stops rocking, you MUST bring it back up to pressure and re-start your timer for 100 minutes.
Yay, you made it through 100 minutes, and your house smells like cooked fish!
Turn off the heat; do NOT move your canner or try to cool it down quickly. Let it sit until your dial has completely droped, or your safety pin has dropped, indicating that the pressure on the inside of the canner is the same as in your house.
Your fish has been cooking at about 235 degrees F /115 degrees C...ABOVE the boiling point of water! It's hot, and will take awhile to cool.
The jars will not properly create a vacuum seal until they have cooled to room temperature, so let them sit for at least 10 hours, or overnight.
Store your delicious fish! Remember, fish contains natural fats, and fats can go rancid, even in jars. Rancidity is caused by exposure to light and heat, so tuck the fish away in a closed cabinet or dark room for maximum flavor and quality. Try to use it up within about a year (when you're canning next year's fish!), but it should be good for quite awhile.
Nice job! Enjoy!
Frequently Asked Questions and Quick Tips!
Never be afraid to ask!
- What kinds of fish CAN I can??
ANSWER: Pretty much any! However, lean fish like halibut or cod tend to break down in the process and may taste a little dry. You can add 1 TBS Olive Oil to each pint of lean fish to keep it moist. The perennial favorites seem to be salmon and albacore tuna!
- Does it matter what kind of salt I use?
ANSWER: Table salt and other very fine-grained salts weigh more per given volume, so be cautious if measuring by volume.
Experiment with different salts; pure salts without iodine or additives are preferred, but some rustic salts will add another dimension to your fermented products.
- Could I do this in a boiling water bath canner?
ANSWER: Sorry, but no! There are people who used to can fish, meats, and low-acid foods this way, but we now know that certain disease-causing organisms can ONLY be destroyed at higher heats, which is why we use pressure. People DO get sick from canned foods, and it's not just a short case of simple food poisoning. Just because it hasn't happened to someone you know, please don't put yourself or others at risk.
Unless indicated otherwise, images, recipes, and other content are Copyright The Mason Jar Suite and Trav Williams. You may print and utilize this information for home and personal purposes. If you wish to republish this recipe, please link to this post or get in touch for other purposes.
Never be afraid to ask!
- What kinds of fish CAN I can??
ANSWER: Pretty much any! However, lean fish like halibut or cod tend to break down in the process and may taste a little dry. You can add 1 TBS Olive Oil to each pint of lean fish to keep it moist. The perennial favorites seem to be salmon and albacore tuna!
- Does it matter what kind of salt I use?
ANSWER: Table salt and other very fine-grained salts weigh more per given volume, so be cautious if measuring by volume.
Experiment with different salts; pure salts without iodine or additives are preferred, but some rustic salts will add another dimension to your fermented products. - Could I do this in a boiling water bath canner?
ANSWER: Sorry, but no! There are people who used to can fish, meats, and low-acid foods this way, but we now know that certain disease-causing organisms can ONLY be destroyed at higher heats, which is why we use pressure. People DO get sick from canned foods, and it's not just a short case of simple food poisoning. Just because it hasn't happened to someone you know, please don't put yourself or others at risk.
Unless indicated otherwise, images, recipes, and other content are Copyright The Mason Jar Suite and Trav Williams. You may print and utilize this information for home and personal purposes. If you wish to republish this recipe, please link to this post or get in touch for other purposes.
.

How To Use A Weighted Gauge Pressure Canner

Print/Download:
How To Use A Weighted Gauge Pressure Canner
Some pressure canners are regulated with dial gauges and some are regulated with weights. If your pressure canner has a dial that attaches to the top, check out this video to see a different set of instructions: https://www.youtube.com/watch?v=M0GFijAePiI
There are 2 primary types of home canning:
Water bath canning &
pressure canning.
Water bath canning can be a great way to preserve some foods; however, low acid foods such as vegetables, meats, poultry and seafood require special handling.
That special handling is what we refer to as pressure canning.
It prevents spoilage from the bacteria that can cause Botulism.
What we do is add steam to the canning environment; that’s going to allow us to raise the temperature inside the canner past the boiling point of water (which is 212° F / 100°C), up to as much as 250°F / 121°C.
Prolonged exposure to higher temperatures is required to DESTROY the spores that cause Botulism.
Remember, when pressure canning:
- Use ONLY tested recipes
- Follow instructions CAREFULLY
- Stick to required processing times EXACTLY!
Materials Needed:
In this video we'll just be doing a 'practice run' with our pressure canner. This will help ensure you understand how the weighted gauge pressure canner works before actually canning anything. Once you're comfortable using your weighted gauge pressure canner, we think you'll agree that canning with it is super, super easy!Here's what you'll need for our pressure canning 'practice run':
- Weighted gauge pressure canning setup
- Stovetop canner (we're using a GraniteWare 20 qt. pressure canner)
- Canning Rack
- Jar lifter
- 4-6 Pint jars filled with water only
- Lids for your jars (new)
- Rings for your jars
Directions:
- First make sure you have all the components for your weighted gauge pressure canner.
- Pressure canner body (large pot)
- Pressure canner lid (with lid gasket sealing ring)
- The pressure regulator and additional weights
- Canning rack
- Next, ensure everything is in working order.
- Hold the lid up to the light and make sure you can see through the vent pipe in the middle.
- If there is any obstruction in the vent pipe, simply insert an unfolded paper clip in the pipe to clear it.
- Also check the other nuts and components on the underside of the lid and make sure they're clean as well.
- Finally, make sure the lid gasket sealing ring is tucked securely in the groove.
- Start the pressure canning 'practice run' by:
- Filling the canner with 3 quarts of water.
- Placing the canning rack over the edges of the canner body.
- Putting our jars filled with water on the canning rack and lowering it into the canner. (Normally these would be filled with our soup or meat or whatever it is we're canning.)
- And finally, putting the lid on the canner (align the arrows and turn clockwise).
- Next place the canner on a level burner (either gas or electric will work).
- Turn the burner to a relatively high heat setting, and heat the canner until a steady stream of steam begins to escape through the vent pipe.
- As soon as the steam is flowing steadily, set a timer for 10 minutes.
- Once the time is up, place the regulator, with the appropriate amount of weight on it, on top of the vent pipe. (Your recipe will indicate how much pressure you should use. For this 'practice run' we're using 15 psi.)
- Once the cover lock has engaged, you'll notice the pressure regulator begin to rock (at first it may go slow or it may go really fast).
- Turn your heat down to low or almost low. Adjust as necessary until the pressure regulator is rocking in a nice consistent pattern.
- Once the regulator is rocking consistently, set your timer for the time required in your recipe.
- When the processing time is complete, turn off the burner and leave the pressure canner alone.
- Let the pressure come down on its own. (With the GraniteWare canner that is usually between 8-15 minutes.)
- Once the locking pin has released, carefully remove the pressure regulator and the weights and let the canner sit for an additional 10 minutes.
- Then loosen the lid and remove it. Lift the lid towards you to shield yourself from any residual steam.
- Remove your jars with a jar lifter and place them on a cloth or a wooden cutting board.
- Leave jars alone overnight to allow them to cool completely.
- Remove the rings and check the seals.
- Label and date your jars.
- Store the jars until ready for use or for sharing with family and friends!
Look for other videos and recipes on how to pressure can meat, fish and more, here at The Mason Jar Suite.
Happy Canning!
Frequently Asked Questions and Quick Tips!
Never be afraid to ask!
- Will my canner explode?
ANSWER: All pressure canners are designed with failsafes and protective features. The newer your canner, most likely, the more failsafes exist.
Your pressure canner’s safety features are very important to the safe operation of the canner. Be sure to familiarize yourself with these features by reading the instruction manual that came with your pressure canner.
Modern pressure canners include the following safety features. Features may vary, depending on the make/model of pressure canner you’re using.
- Lid gasket sealing ring
- Locking lid
- Backup lid lock (that activates when there is pressure in canner and releases when the pressure has dissipated)
- Backup safety valve (there may be more than one of these depending on the make/model of your canner)
Rest assured that if for some reason the pressure on your canner got too high, the backup safety would release the pressure inside the canner and avoid the possibility of any ‘explosion’.
- Can I use my canner as a pressure COOKER?
ANSWER: While many pressure canners may be used to pressure cook, it’s always good to check your instruction manual to ensure the manufacturer recommends it for this use. If your pressure canner can also be used to pressure cook, then utilizing it in this way may just be matter of personal preference—since pressure canners tend to be much larger than pressure cookers.
- Can I use a pressure COOKER to can food?
ANSWER: A pressure cooker was not built to do either of the following, both of which are critical components to pressure canning and safe food preservation.
- Monitor pressure/temperature accurately
- Maintain a specific pressure over time
In addition, a canner needs to be large enough to hold at least 4 quart jars. While this may be true of some pressure cookers, a large pressure canner takes longer to come to pressure and cool down again, and that time is factored into the processing time required for safely canning low acid foods. Complete USDA canning times and recipes are available at the National Center For Home Food Preservation, www.uga.edu/nchfp.
Unless indicated otherwise, images, recipes, and other content are Copyright The Mason Jar Suite and Broken Banjo Enterprises. You may print and utilize this information for home and personal purposes. If you wish to republish this recipe, please link to this post or get in touch for other purposes.
Never be afraid to ask!
- Will my canner explode?
ANSWER: All pressure canners are designed with failsafes and protective features. The newer your canner, most likely, the more failsafes exist. Your pressure canner’s safety features are very important to the safe operation of the canner. Be sure to familiarize yourself with these features by reading the instruction manual that came with your pressure canner.
Modern pressure canners include the following safety features. Features may vary, depending on the make/model of pressure canner you’re using.- Lid gasket sealing ring
- Locking lid
- Backup lid lock (that activates when there is pressure in canner and releases when the pressure has dissipated)
- Backup safety valve (there may be more than one of these depending on the make/model of your canner)
- Can I use my canner as a pressure COOKER?
ANSWER: While many pressure canners may be used to pressure cook, it’s always good to check your instruction manual to ensure the manufacturer recommends it for this use. If your pressure canner can also be used to pressure cook, then utilizing it in this way may just be matter of personal preference—since pressure canners tend to be much larger than pressure cookers. - Can I use a pressure COOKER to can food?
ANSWER: A pressure cooker was not built to do either of the following, both of which are critical components to pressure canning and safe food preservation.- Monitor pressure/temperature accurately
- Maintain a specific pressure over time
Rest assured that if for some reason the pressure on your canner got too high, the backup safety would release the pressure inside the canner and avoid the possibility of any ‘explosion’.
In addition, a canner needs to be large enough to hold at least 4 quart jars. While this may be true of some pressure cookers, a large pressure canner takes longer to come to pressure and cool down again, and that time is factored into the processing time required for safely canning low acid foods. Complete USDA canning times and recipes are available at the National Center For Home Food Preservation, www.uga.edu/nchfp.
Unless indicated otherwise, images, recipes, and other content are Copyright The Mason Jar Suite and Broken Banjo Enterprises. You may print and utilize this information for home and personal purposes. If you wish to republish this recipe, please link to this post or get in touch for other purposes.
How To Use A Water Bath Canner

Print/Download:
How To Use A Water Bath Canner
So, you're ready to start preserving food and you want to know about water bath canning. There lots of benefits to canning and preserving, AND it's really easy to do!
If you follow directions for each recipe EXACTLY and inspect each jar carefully before serving, you and your friends will be enjoying the 'fruits of your labor' all year long!
How Water Bath Canning Works:
Here's a brief explanation of how the water bath canning process works and why it's so important.- First, food is placed in a clean mason jar.
- A lid, with a rubber sealing compound, is placed on the jar.
- A ring, which screws onto the jar, is put on top of the lid to hold it in place.
- Headspace is always left between the food and the lid.
- Then the jar is submerged in boiling water.
- Because air expands when exposed to heat, the air in the jar expands and forces its way out from under the lid.
- That's why there are always bubbles when jars are first placed in the boiling water.
- After a certain amount of time has passed, jars are removed from the canner and the air inside begins to shrink again.
- The rubber sealing compound on the lid will not allow air in, so the lid is sucked shut, creating an oxygen-free vacuum inside the jar.
- Not only have you killed the microorganisms that might get you sick or spoil the food, you've created an environment in which they cannot survive.
- Free of oxygen
- High in acid
- It's always important to follow a tested recipe when water bath canning because not everything can be water bath canned.
Things You Can Water Bath Can:
It's possible to water bath can foods that are high in acid like:- Tomatoes and tomato products
- Fruits, jams and jellies
- Pickles
- Some fermented products like sauerkraut
Things You Can't Water Bath Can:
Other foods, like the following, need to be pressure canned or frozen or preserved in some other way.- Meats
- Fish
- Most vegetables
- Soups
Materials Needed:
- Water bath canner (we're using a 21.5 quart GraniteWare water bath canner)
- Canner pot and lid
- Canning rack
- Accessory kit (our kit includes spatula, lid lifter, jar wrench, jar lifter and a funnel)
- A pot to heat your food
- A ladle for filling jars
- Small pot to heat lids and rings
- Canning jars
- Brand new lids and rings
Directions:
Be sure to ALWAYS use tested recipes whenever you're canning. Don't risk your own health or that of your family and friends on foods that have not been properly processed or preserved.
In this video, we're going to be processing salsa, though the focus of this video is about getting you comfortable with your water bath canner. Keep in mind, the steps we'll be walking you through will apply to most of the things you're going to be water bath canning.
In this video, we're going to be processing salsa, though the focus of this video is about getting you comfortable with your water bath canner. Keep in mind, the steps we'll be walking you through will apply to most of the things you're going to be water bath canning.
- First, you'll need to prep your food according to the recipe you're using.
- Next, you'll need to heat things up.
- First, heat your food to a simmer or a boil, according to the recipe.
- While your food is heating, heat water in a smaller pot to just below a simmer, to heat up your lids and rings. You don't need to boil them, we just want them the same temperature as everything else.
- In most cases, you're going to want to heat up your jars as well, so they don't go into the canner 'cold'. You can do this in one of several ways.
- Heat jars in a separate large pot of boiling water.
- Fill your sink with boiling water and heat jars there.
- Or for small batches, boil water in your canner and heat your jars there.
- When your food has cooked for the correct amount of time, remove your jars from the boiling water and place them on a cloth or cutting board where you have some room to work.
- Leave your lids and rings in the hot water until you're ready for them.
- Ladle the food into your jars-- it's best to use a funnel to do this.
- Leave the correct amount of head space in each jar, as indicated by your recipe.
- To remove trapped air bubbles, tamp the jars gently once or twice on the counter and run a silicon or rubber spatula around the edges of the jar.
- Wipe the rims of the jars with a clean cloth or paper towel to remove any food.
- Next, use tongs or a magnetic lid lifter to pull the lids out of the hot water.
- Center each lid on a jar and then screw the rings on to fingertip tightness. Twist just until you meet the first bit of resistance and then turn lids once more.
- Now that all your jars are filled with hot food, use a jar lifter to transfer them to the jar rack in your canner.
- Once the rack is full, gently lower it into the canner, being careful not to splash yourself with hot water.
- Make sure that no matter what size jar you're using there is at LEAST 2 inches of water above the tops of the jars. That way you ensure your jars will always be submerged.
- Once your jars are in the canner, you can always add more hot water, if needed. You might want to keep some hot water near by in a tea kettle.
- Before you start the timer for your recipe's processing time, make sure the water in the canner has come back to a rolling boil.
- Place the lid on the canner and once the water is at a rolling boil, set a timer to the amount of processing time indicated in your recipe.
- Once the processing time has elapsed, turn off the burner and use the jar lifter to remove the jars from the canner.
- Be sure not to tip the water off the lids of the jar when you remove them from the canner. This can cause the food to slosh around in the jar and can ruin the seal.
- Set the jars on a cloth or a cutting board where they'll be out of the way and let them cool overnight.
- When the jars have cooled completely, it's best to take off the rings. That way, you can avoid having your lids rust if there's water trapped in the ring.
- You'll also want to check that all of your jars have a good seal. You're looking for a convex lid (one that's sucked down). You can also tell by pushing down on the lid, which, if there's a good seal, should have very little give.
- Now all you need to do is label and store your food.
- Or proudly share it with family and friends!
Frequently Asked Questions and Quick Tips!
Never be afraid to ask!
- If I'm new to canning is water bath canning the best place to start?
ANSWER: While both water bath canning and pressure canning are relatively simple-- once you understand the processes-- water bath canning can be a less intimidating place to start. However, since only foods high in acid can be water bath canned, it does limit what you can preserve using this method.
For more information on general canning principles and understanding how both water bath and pressure canners are meant to be used, we recommend the following links.
General Canning Information
Using Boiling Water Canners
Using Pressure Canners
In addition, those just starting out with canning may also find it helpful to go through the National Center for Home Food Preservation free, self-study course publications via the link below.
USDA Complete Guide To Home Canning
- Why is it so important to use only tested recipes when canning?
ANSWER: For home canning, the specific recipe, and usually the preparation method, will determine how the product can be processed--whether in a water bath canner or a pressure canner. As mentioned above, a water bath canner can only be used for acid and properly acidified foods, while a pressure canner can be used for low-acid foods. Then, the process time in the canner will be dependent on the specific recipe and product characteristics.
The USDA and Cooperative Extension program encourage consumers to use tested, science-based home-canning recipes from reliable sources like their websites or some equipment or home preserving ingredient manufacturers. In fact, here's a great resource for canning recipes from our friends at Ball.
Canning Recipes
- Why can't I preserve meat, veggies and other low-acid foods in a water bath canner?
ANSWER: Because meat and most veggies are low-acid foods, they must be processed in a pressure canner. Water bath canners can't get water any hotter than 212 F (at sea level), which is the boiling point of water, and that's not hot enough to kill the bacteria that can grow in low acid foods. In a pressure canner, the presence of steam allows the internal temperature of the canner to rise up to 250° F, which is a safe temperature to ensure that harmful bacteria are killed.
Unless indicated otherwise, images, recipes, and other content are Copyright The Mason Jar Suite and Broken Banjo Enterprises. You may print and utilize this information for home and personal purposes. If you wish to republish this recipe, please link to this post or get in touch for other purposes.
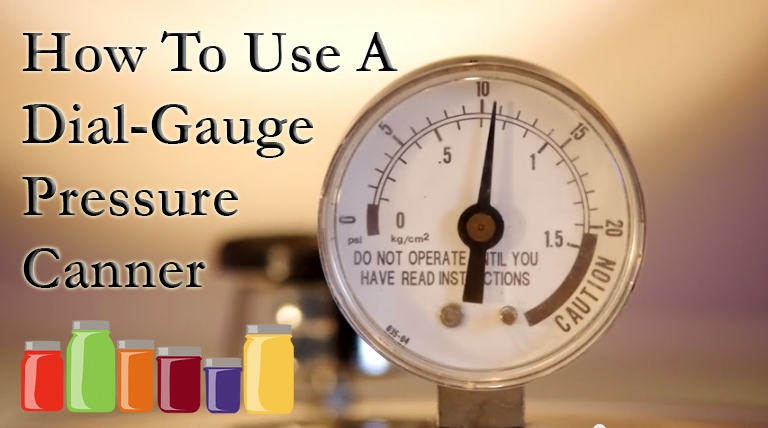
How to Set Up and Use a Dial-Gauge Pressure Canner
How to Set up and Use a Dial-Gauge Pressure Canner
So, you've got yourself a pressure canner and it's time to start preserving some food. But maybe you've never done this before or it's just been a really long time. Or perhaps, you've never used this style of pressure canner.
Just as a bit of background, there are 2 primary types of home canning:
Water bath canning &
pressure canning.
Water bath canning can be a great way to preserve some foods, but low acid foods such as vegetables, meats, poultry and seafood require special handling to prevent spoilage from the bacteria that can cause Botulism.
That special handling is what we refer to as pressure canning. In fact, when we add steam to the canning environment-- which is what we do in pressure canning-- we effectively raise the temperature inside the canner past the boiling point of water (which is 212° F / 100°C), up to as much as 250°F / 121°C. Prolonged exposure to higher temperatures is required to DESTROY the spores that cause Botulism.
Remember, when pressure canning:
- Use ONLY tested recipes
- Follow instructions CAREFULLY
- Stick to required processing times EXACTLY!
Materials Needed:
In this video we'll just be doing a 'practice run' with our pressure canner. You can do this, too. Or if you're really itching to can something today-- just go for it! Either way, we'll show you how to set up and get comfortable with using a dial-gauge pressure canner.Here's what you'll need to get started:
- Dial-gauge pressure canning setup
- Stovetop canner
- Cooking rack
- Jar lifter
- 4-6 pint jars filled with water only (or jars filled with whatever you've prepared, following a tested recipe)
- Lids for your jars (new)
- Rings for your jars
Setting Up:
- Read through the manual for your pressure canner and familiarize yourself with all the parts and pieces. Make sure you're not missing anything before you start.
- Make sure the overpressure plug and the dial gauge are both in place on the lid.
- Also make sure the rubber gasket is tucked in the groove on the underside of the lid.
- If the gasket is dry or it's been awhile since you've used the canner, you can rub the gasket with a little cooking oil to ensure it stays pliable and provides a good seal.
Start Canning:
- Add 3 quarts of water to the canner. You do not want to cover the jars in water, like you would in a water bath canner.
- Place the cooking rack on the bottom of the canner. You never want your jars to touch the bottom of the canner.
- Place your jars-- either filled with water or filled with the food you've prepared following a tested recipe-- on the canning rack, using a jar lifter.
- Check the vent pipe on the lid by holding it up to the light and making sure you can see right through it. It's VERY important that air can escape through this pipe.
- Find the arrows or 'v' marked on the lid and on the handles of the canner body. Line them up, press down slightly and then twist the lid so the handles on the lid are lined up with the handles on the pot. You should feel a little resistance, which indicates there's a good seal.
- Place the canner on a burner on the stove (either gas or electric) and turn it to a fairly high heat. Let it start to boil and keep an eye on it. After a few minutes, you should start to see a steady flow of steam coming from the vent pipe.
- Once the steady flow of steam has begun, set a timer for 10 minutes. This will exhaust the steam from the canner.
- When 10 minutes has elapsed, VERY CAREFULLY place the pressure regulator on top of the vent pipe. You may want to use a glove or a hot pad to do this.
- Once you've placed the pressure regulator on the vent pipe, you'll see the dial on the gauge begin to rise. The cover lock in the air vent will also rise, indicating there is pressure inside the canner.
- Now you'll let the gauge start rising to the required pressure, as indicated in your recipe. When your pressure gets close to the amount of pressure you need, you'll want to start controlling the heat in order to keep your pressure steady at the target psi.
- It's okay for your pressure to get a little higher than what's called for in your recipe, but it must NEVER DROP BELOW that amount.
- If the pressure does drop below the amount required, you will need get it back to the required pressure and start your processing time all over.
- Once you've hit your target pressure AND as long as it never drops below that level, you can set a timer for the amount of processing time required in the recipe you're using.
- Make sure you monitor your canner the ENTIRE time it is processing.
- When the target time has been reached, turn off the heat and let your canner sit undisturbed. Let the pressure drop all the way to zero AND wait for the cover lock in the air vent to drop back down.
- Remove the pressure regulator from the air vent and let the canner sit for an additional 5-10 minutes.
- Then carefully rotate the canner lid the opposite direction from when you put it on and lift it towards you to ensure you are shielded from any residual steam.
- Remove the jars from the canner, using your jar lifter, and place them on a cloth or a wood cutting board to cool.
- Leave jars for several hours or overnight, until they're completely cool to the touch.
- Then, make sure the jars are sealed, remove the screw top bands and label and date them.
- Store your jars until you're ready to enjoy the 'fruits of your labor' or share them with friends and family.
- Enjoy!
Happy Canning!
Frequently Asked Questions and Quick Tips!
Never be afraid to ask!
- What should I do if the pressure in my canner goes over the pressure indicated in my recipe?
ANSWER: Don't worry if your pressure goes over the required amount. Just make sure you DON'T let it dip below the pressure required.
- What should I do if the pressure in my canner drops below what's required in my recipe?
ANSWER: All is not lost! You just need to get your pressure back up to the required psi and once it's holding steady, begin your processing time all over again. It's that easy.
- How often (how) should I get my gauge tested?
ANSWER:It's important to check and calibrate your gauge for accuracy at least once a year or if you accidentally drop it or submerge it in water. Call your county extension agent (find them here: http://npic.orst.edu/pest/countyext.htm). They will test it for you for free!
- What do I do if my vent pipe is blocked?
ANSWER: If you cannot see completely through the vent pipe when you hold the lid up to the light, no worries! Simply unbend a paper clip and insert it into the vent pipe to clear the obstruction.
Unless indicated otherwise, images, recipes, and other content are Copyright The Mason Jar Suite and Broken Banjo Enterprises. You may print and utilize this information for home and personal purposes. If you wish to republish this recipe, please link to this post or get in touch for other purposes.
Never be afraid to ask!
- What should I do if the pressure in my canner goes over the pressure indicated in my recipe?
- What should I do if the pressure in my canner drops below what's required in my recipe?
- How often (how) should I get my gauge tested?
- What do I do if my vent pipe is blocked?
ANSWER: Don't worry if your pressure goes over the required amount. Just make sure you DON'T let it dip below the pressure required.
ANSWER: All is not lost! You just need to get your pressure back up to the required psi and once it's holding steady, begin your processing time all over again. It's that easy.
ANSWER:It's important to check and calibrate your gauge for accuracy at least once a year or if you accidentally drop it or submerge it in water. Call your county extension agent (find them here: http://npic.orst.edu/pest/countyext.htm). They will test it for you for free!
ANSWER: If you cannot see completely through the vent pipe when you hold the lid up to the light, no worries! Simply unbend a paper clip and insert it into the vent pipe to clear the obstruction.
Unless indicated otherwise, images, recipes, and other content are Copyright The Mason Jar Suite and Broken Banjo Enterprises. You may print and utilize this information for home and personal purposes. If you wish to republish this recipe, please link to this post or get in touch for other purposes.
How To Make Tamales Using A Pressure Steamer
Print/Download:
How To Make Tamales With A Pressure Steamer
Yield: Approx. 35 tamales each recipe
Total Time:
2 hours 20 minutes
Prep: 1 hour
Inactive: 1 hour
Cook: 20 minutes
What could be better than a batch of fresh homemade tamales? How about impressing your family and friends with a couple dozen of these tasty treats?
We'll show you how to make two different kinds of tamale fillings and dough, assemble your tamales like a pro and then cook them in a pressure canner/steamer in way less time than it would take in a traditional steamer!
We paired the Spicy Pork Filling with the Basic Masa Dough and the Vegetarian Cheese Filling with the Vegetarian Masa Dough, but feel free to mix and match however you'd like.
Materials Needed:
- Knife and cutting surface
- Electric stand mixer or hand beater
- Pressure canner/steamer set-up
- Stovetop canner
- Steamer rack
- Masa dough (see recipes below)
- Tamale fillings (see recipes below)
- Corn husks
Ingredients:
Pork Tamale Filling
- 1-1/2 cups (8 oz) diced carrots
- 1 ea (8 oz) sliced onions
- 1-1/2 cups (8 oz) sliced peppers
- 1/4 cup apple cider vinegar
- 1/8 cup sugar
- 2 lbs pork
- 2 tsp salt
- 1/4 cup olive oil
- 1 cup water
- 1/2 cilantro leaves
-
1) Place all of the above in a slow cooker/crockpot and cook 6-8 hours on medium or high. 2) Pull pork with all ingredients and place in refrigerator. 3) Allow to cool at least 2 hours. 4) Drain excess liquid from mixture (and save it for cooking other meals). 5) Make sure all ingredients are well-mixed before using to fill tamales.
Veggie Tamale Filling
- 2 cups (6 oz) sliced cabbage
- 1-1/2 cups (8 oz) diced carrots
- 2 Tbs olive oil
- 1 ea (8 oz) sliced onions
- 1-1/2 cups (6 oz) sliced peppers
- 1/4 cup apple cider vinegar
- 1/8 cup sugar
- 2 tsp salt
- 1 cup (5 oz) cheddar (or other) cheese, diced
-
1) In a pot, sauté carrots and onions in olive oil. 2) When softened, add cabbage and peppers. 3) Sauté for 2-3 minutes more. 4) Add vinegar, sugar and salt. 5) On high heat, stir all ingredients to coat. 6) Remove pot from heat and let cool 15 minutes. 7) Add small-diced cheese and stir to mix. 8) Allow to fully cool and make sure ingredients are well-mixed before using to fill tamales.
Basic Masa Dough
- 1-1/2 cups (12 oz) pork fat/lard
- 2 tsp baking powder
- 4-1/2 cups (1-1/2 lbs) masa harina corn flour
- 3 cups hot water
- 1-1/2 cups beef or chicken broth
- 1 tsp salt
- 1/2 tsp cumin
Vegetarian Masa Dough
- Using recipe above, substitute the following ingredients, as indicated:
- 1-1/2 cups (12 oz) butter in place of pork fat/lard
- 1-1/2 cups vegetable broth in place of beef or chicken broth
-
1) To prepare masa dough, pour hot water over masa harina flour and mix thoroughly. 2) Let sit 15 minutes to fully hydrate. 3) In an electric mixer, or with a hand beater, whip up the fat/lard (or butter), baking power, salt and cumin until fluffy, about 1 minute. 4) Once whipped, begin alternately adding the masa mix and the broth, continuing to mix on a slow-medium speed. 5) When all ingredients are well mixed, try dropping a teaspoon of the dough into a cup of cold water. 6) If it floats, you've got a nice, fluffy dough. 7) Chill dough for at least 1 hour before making tamales.
Assembly & Steaming Directions:
- Place the corn husks in a bowl or tub and cover them with hot water. Weight them down with something heavy to keep them submerged. Let them sit for an hour or so until they're very pliable.
- Prepare fillings and masa dough according to the instructions above.
- Take the corn husks out of the hot water and pat them dry with a towel.
- For tamale assembly, gather up the following:
- Corn husks
- Masa dough
- Tamale fillings
- Bowl with water to wash your hands so they don't get too sticky
- Assemble your tamales with these easy steps:
- Place the tapered end of the corn husk toward you.
- Take a small amount of dough and roll it into a ball in your hands.
- Spread the dough into a fairly even rectangle, leaving a border around the husk, so the dough doesn't overflow.
- Then take a little bit of filling and place a line of it down the middle of the dough.
- Grab both sides of the husk and pull one side of the masa over to the other so they touch on top of the filling. Pull back the husk quickly so it doesn't stick to the dough. Press all sides of the masa together so you don't see your filling anymore.
- Hint: If your hands or the dough have too much water on them, the masa dough will stick.
- Wrap one side of the corn husk over the masa, fold up the tapered end and fold over the other side.
- Tie everything together with a piece of string or a strip of corn husk.
- Once all of the tamales are prepared, you're ready to pressure steam them.
- Prepare the pressure steamer (we used a GraniteWare 20 qt pressure canner/cooker/steamer).
- Add 3 quarts of water to the pot, so it's just under where the steamer rack sits. You don't want your tamales sitting in any of the water.
- Place the steamer rack in the pressure steamer.
- Place the tamales, folded side down and open side up on the steamer rack. This keeps the filling from leaking out while steaming.
- Next, place the lid on the steamer, lining up the arrows on the lid with the arrows on the handle.
- Turn the lid until the handles on the top are lined up with the handles on the steamer.
- Put the filled steamer on the stove and turn on the burner to a relatively high heat.
- Leave the heat on high until a steady stream of steam flows freely from the vent pipe.
- Exhaust all the air from the steamer for 10 minutes.
- Carefully place the pressure regulator, with 2 weights (15 psi) over the vent pipe.
- Wait for the pressure regulator to start rocking.
- Once the pressure regulator begins to rock, adjust your heat.
- You want the rocking to be steady and consistent-- not stopping and starting.
- Set your timer for 20 minutes. (About 1/3 of the time it would take in a traditional steamer!)
- After 20 minutes, turn the burner off and let the pressure steamer just sit, allowing the pressure to release naturally.
- Once the pressure is released (approx. 5-10 minutes), carefully remove the pressure regulator. (Use a hot pad or tongs to avoid burning yourself.)
- Loosen the lid on the steamer and then carefully remove it, being sure to tip it away from you to shield yourself from any residual steam in the pot.
- Now it's time to enjoy your HOT TAMALES!
NOTE: Tamales can be placed in plastic bags and stored in the freezer for enjoying later. When you're ready to eat them, simply place them in a traditional steamer and steam for approximately 10-15 minutes. No need to thaw them out!
Frequently Asked Questions and Quick Tips!
Never be afraid to ask!
- Can I use my canner as a pressure COOKER?
ANSWER: While many pressure canners may be used to pressure cook, it’s always good to check your instruction manual to ensure the manufacturer recommends it for this use. If your pressure canner can also be used to pressure cook, then utilizing it in this way may just be matter of personal preference—since pressure canners tend to be much larger than pressure cookers.
- What are the advantages of pressure cooking/steaming?
ANSWER: Pressure cooking/steaming takes less time than conventional cooking techniques. Typically, pressure cookers/steamers can reduce cooking times by as much as 70%. In addition, pressure cooking/steaming is very healthy. Because foods cook in a shorter amount of time, they retain more of their nutrients. In addition, it can make a less expensive cut of meat more moist and tender than with traditional cooking methods.
Unless indicated otherwise, images, recipes, and other content are Copyright The Mason Jar Suite and Broken Banjo Enterprises. You may print and utilize this information for home and personal purposes. If you wish to republish this recipe, please link to this post or get in touch for other purposes.

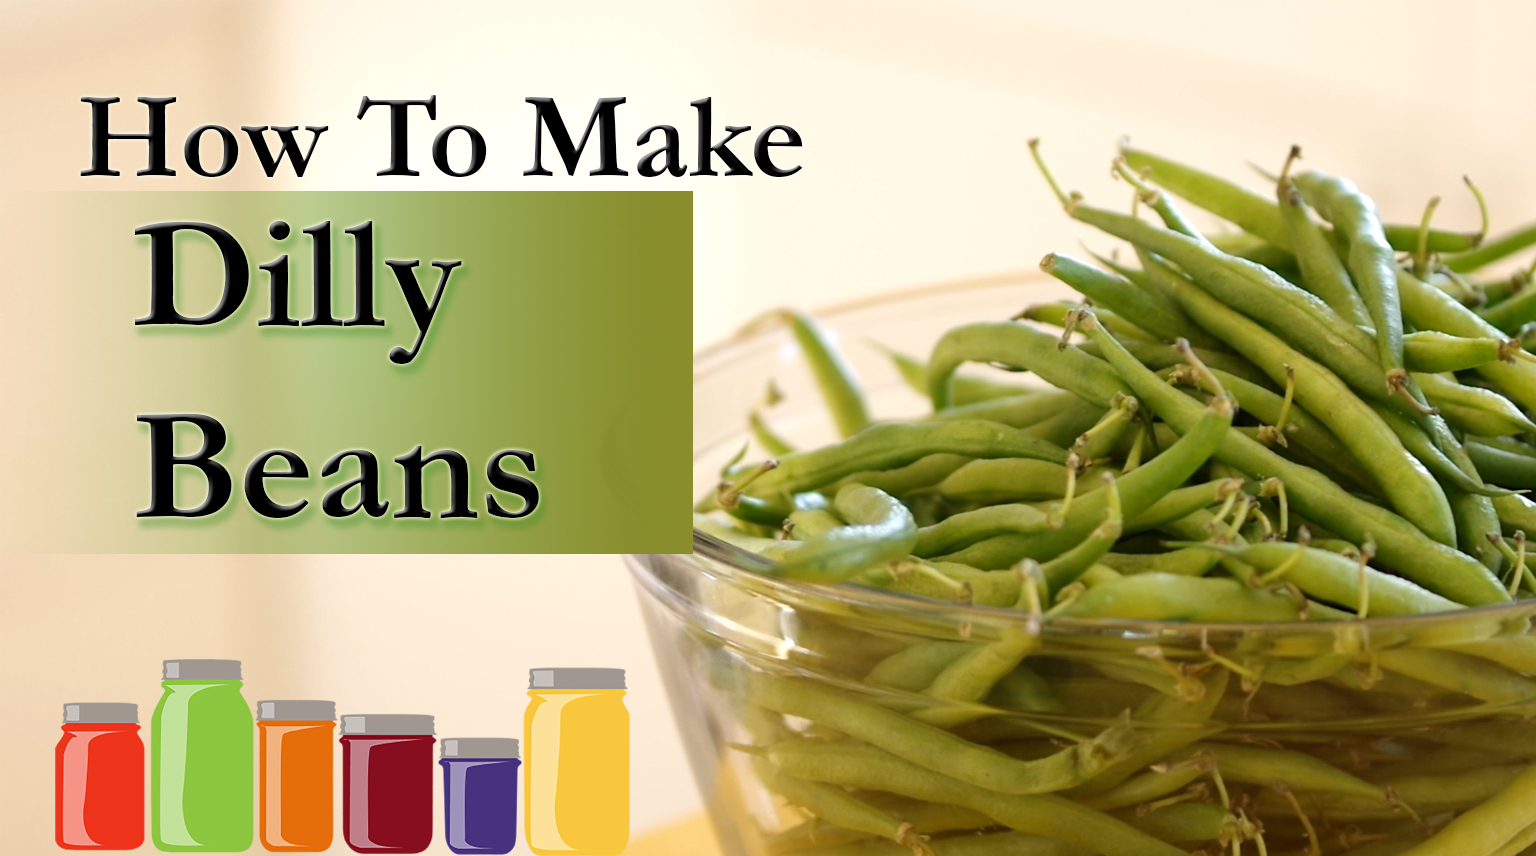
How to Can Dilly Beans
Print/Download:
Dilly Beans
Yield: About 9 canned pints.
Total Time: 45 minutes prep + 10 minutes in water-bath canner.
Show up at a potluck, a board meeting, or a BBQ with a couple of jars of Dilly Beans, pop one open, and watch the crowd gather! Shout "Dilly Beans!" as loud as you can, and listen to the compliments roll in!
There are three key elements to a jar of Dilly Beans:
- Green Beans (fresh and crisp)
- A pickle brine (ALWAYS follow a tested recipe!)
- Flavoring ingredients (Dill, Garlic, etc.)
Materials Needed:
- Knife and cutting surface
- 9 Pint jars (more or less, depending on how many beans you'll work with)
- Lids for your jars (new)
- Rings for your jars
- Water-Bath Canning setup
- Stovetop canner
- Canning Rack
- Jar lifter
Ingredients:
Imperial Units
- 5 lbs Green Beans
- 3/4 cup (7 oz.) salt
- 5 cups Vinegar (5% acidity)
- 5 cups water
Metric Units
- 2.25 kg Green Beans
- 180 ml (200 g) salt
- 1.2 Liters Vinegar (5% acidity)
- 1.2 Liters water
Optional Ingredients:
- 3-4 heads Garlic
- 12 sprigs fresh dill
- Other flavoring ingredients (peppers, spices, mustard seed, carrots, onion...)
Directions:
- Remove stems from beans. Pick them off with your fingers OR just line some beans up and chop them off.
- Wash your beans! Whether you grew them or purchased them, starting with clean beans is important.
- Mix your brine.
- You can use apple cider vinegar or white vinegar, as long as it is labled as being at least 5% acidity.
- Mix water, vinegar, and salt together in a pot.
- Prepare your other ingredients:
- Since everything you add to these jars will be pickled by the brine, you can add other vegetables, spices, or herbs to experiment! Just don't reduce the amount of vinegar in the recipe.
- We peeled enough garlic cloves to add 1-3 to each jar.
- Pick a few sprigs of dill to give these beans their namesake.
- We chose to add a couple of slices of habanero pepper to each jar for spice, color, and flavor.
- Try adding mustard seed, dill seed, sliced carrots, onions, leeks, or other spices. Each batch can be unique!
- Bring your brine to a boil.
- Bring this to a rolling boil on the stove.
- If your brine boils before you're ready to use it, that's okay; keep it hot, and cover it until you're ready to use it.
- Prepare your canner.
- Fill your canner with water, leaving 4-5 inches of room (water will be displaced when you add your jars).
- Put your clean jars into the canner.
- Bring the canner water to a simmer.
- When you're ready, line up your hot jars on a counter or table for filling.
- Pack the jars.
- Put your flavoring ingredients into the jars.
- Line up your beans and pack as many as you can into the jars.
- Add your hot brine.
- Leave 1/2 inch of headspace between the brine and the jar lid.
- Be sure that all ingredients are submerged below the hot liquid.
- Can your beans!
- Follow standard water-bath canning techniques; put your jars into your canner and wait for the canner to come to a rolling boil.
- Process for 10 minutes.
- Store them!
- Store in a cool, dark place, without their rings. As with most pickles, wait a few weeks before eating.
Unless indicated otherwise, images, recipes, and other content are Copyright The Mason Jar Suite and Broken Banjo Enterprises. You may print and utilize this information for home and personal purposes. If you wish to republish this recipe, please link to this post or get in touch for other purposes.
Frequently Asked Questions and Quick Tips!
Never be afraid to ask!
- What if I have brine left over after filling the jars?
Just put it in a container and put a lid on it; save it in your refrigerator for the next batch of beans! - Does it matter what kind of salt I use?
Table salt and other very fine-grained salts weigh more per given volume, so be cautious if measuring by volume.
Experiment with different salts; pure salts without iodine or additives are preferred, as minerals can discolor your beans.
- How long will these beans keep?
Like many pickle recipes, it is recommended to consume most of your jars within 1 year. The longer they sit after that, the more likely the beans will be softer or discolored.
Never be afraid to ask!
- What if I have brine left over after filling the jars?
Just put it in a container and put a lid on it; save it in your refrigerator for the next batch of beans! - Does it matter what kind of salt I use?
Table salt and other very fine-grained salts weigh more per given volume, so be cautious if measuring by volume.
Experiment with different salts; pure salts without iodine or additives are preferred, as minerals can discolor your beans. - How long will these beans keep?
Like many pickle recipes, it is recommended to consume most of your jars within 1 year. The longer they sit after that, the more likely the beans will be softer or discolored.
How to Make Sauerkraut
SPONSORS:

Thank you to Ball for supplying The Mason Jar Suite with jars for our first episodes!

Thank you to Granite•Ware for requesting custom videos and supplying us with canners!
